
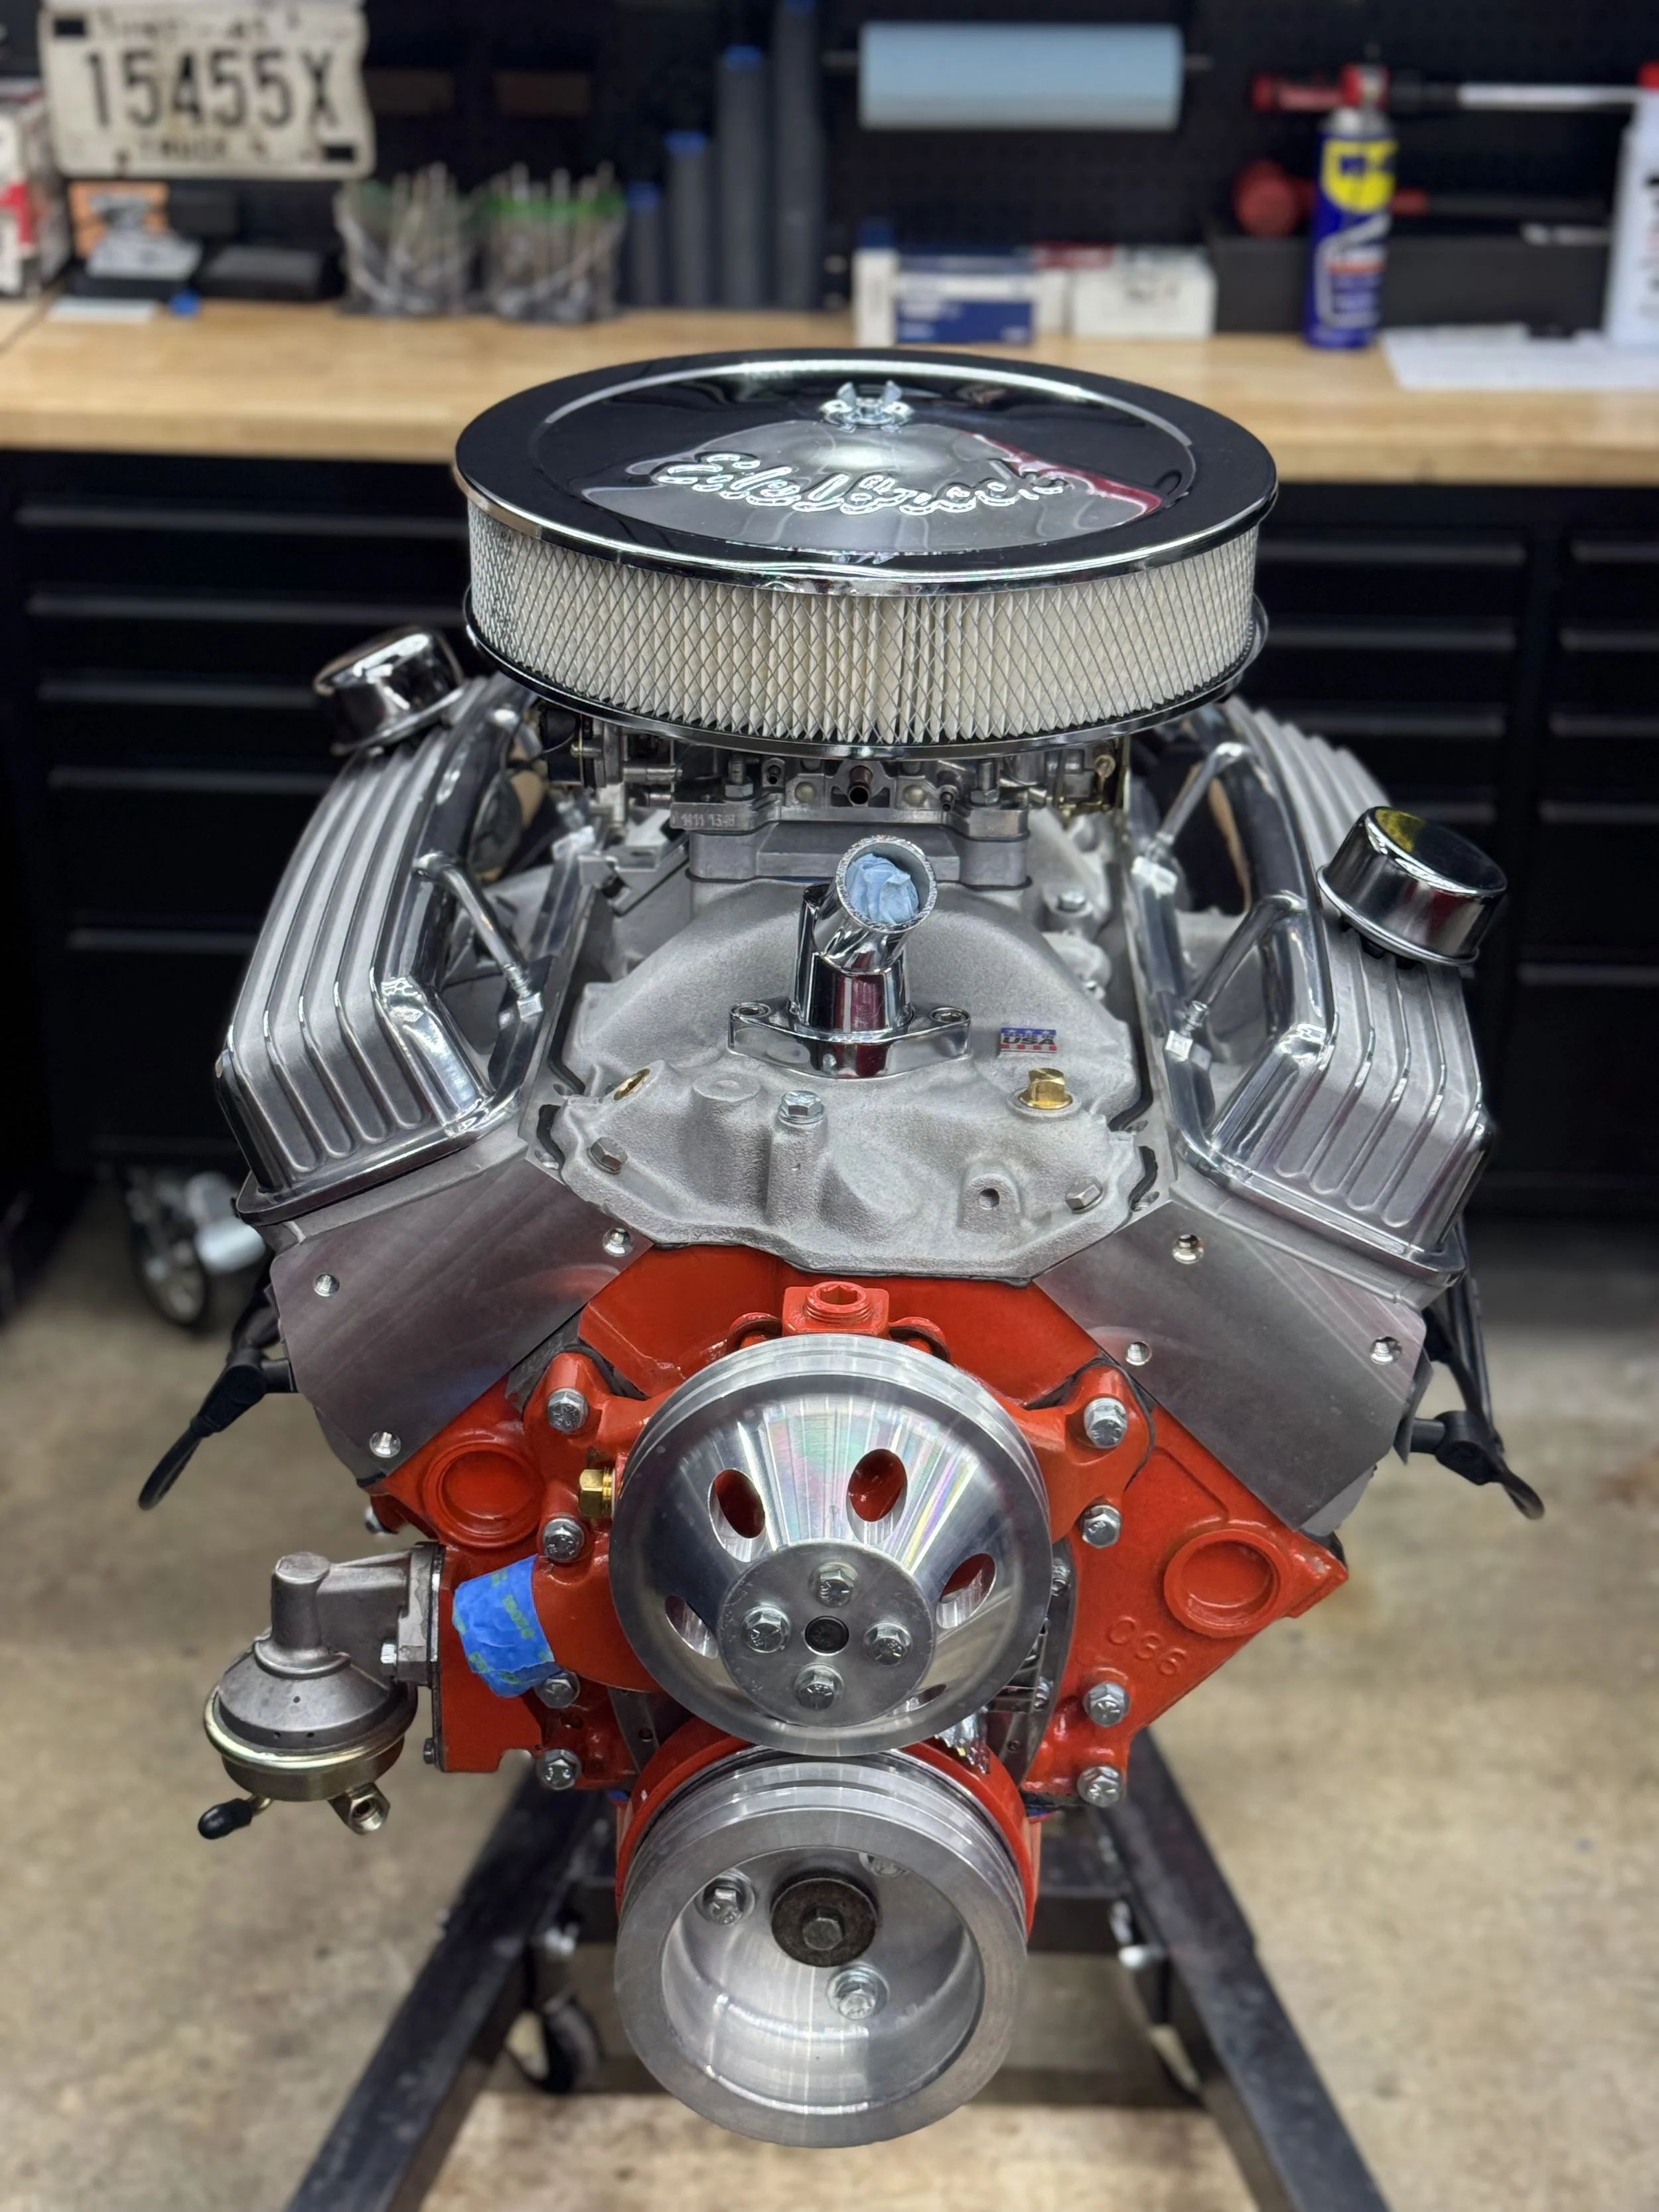
“Poor Man’s Performance 350” - Budget 350
Main Components
Non-Roller Block
4 Bolt Main
Standard Bore
Cast Pistons w/ 4 Valve Reliefs - +12cc Effective Piston Head Volume
Stock style pistons, limits compression ratio to a lower number but extremely cost effective
190cc Speedmaster Aluminum Heads
64cc Combustion chamber - Helps negate the large effective piston head volume by reducing combustion chamber size. Allows us to get a nice bump in compression and make power effectively.
2.02/1.80 Valves
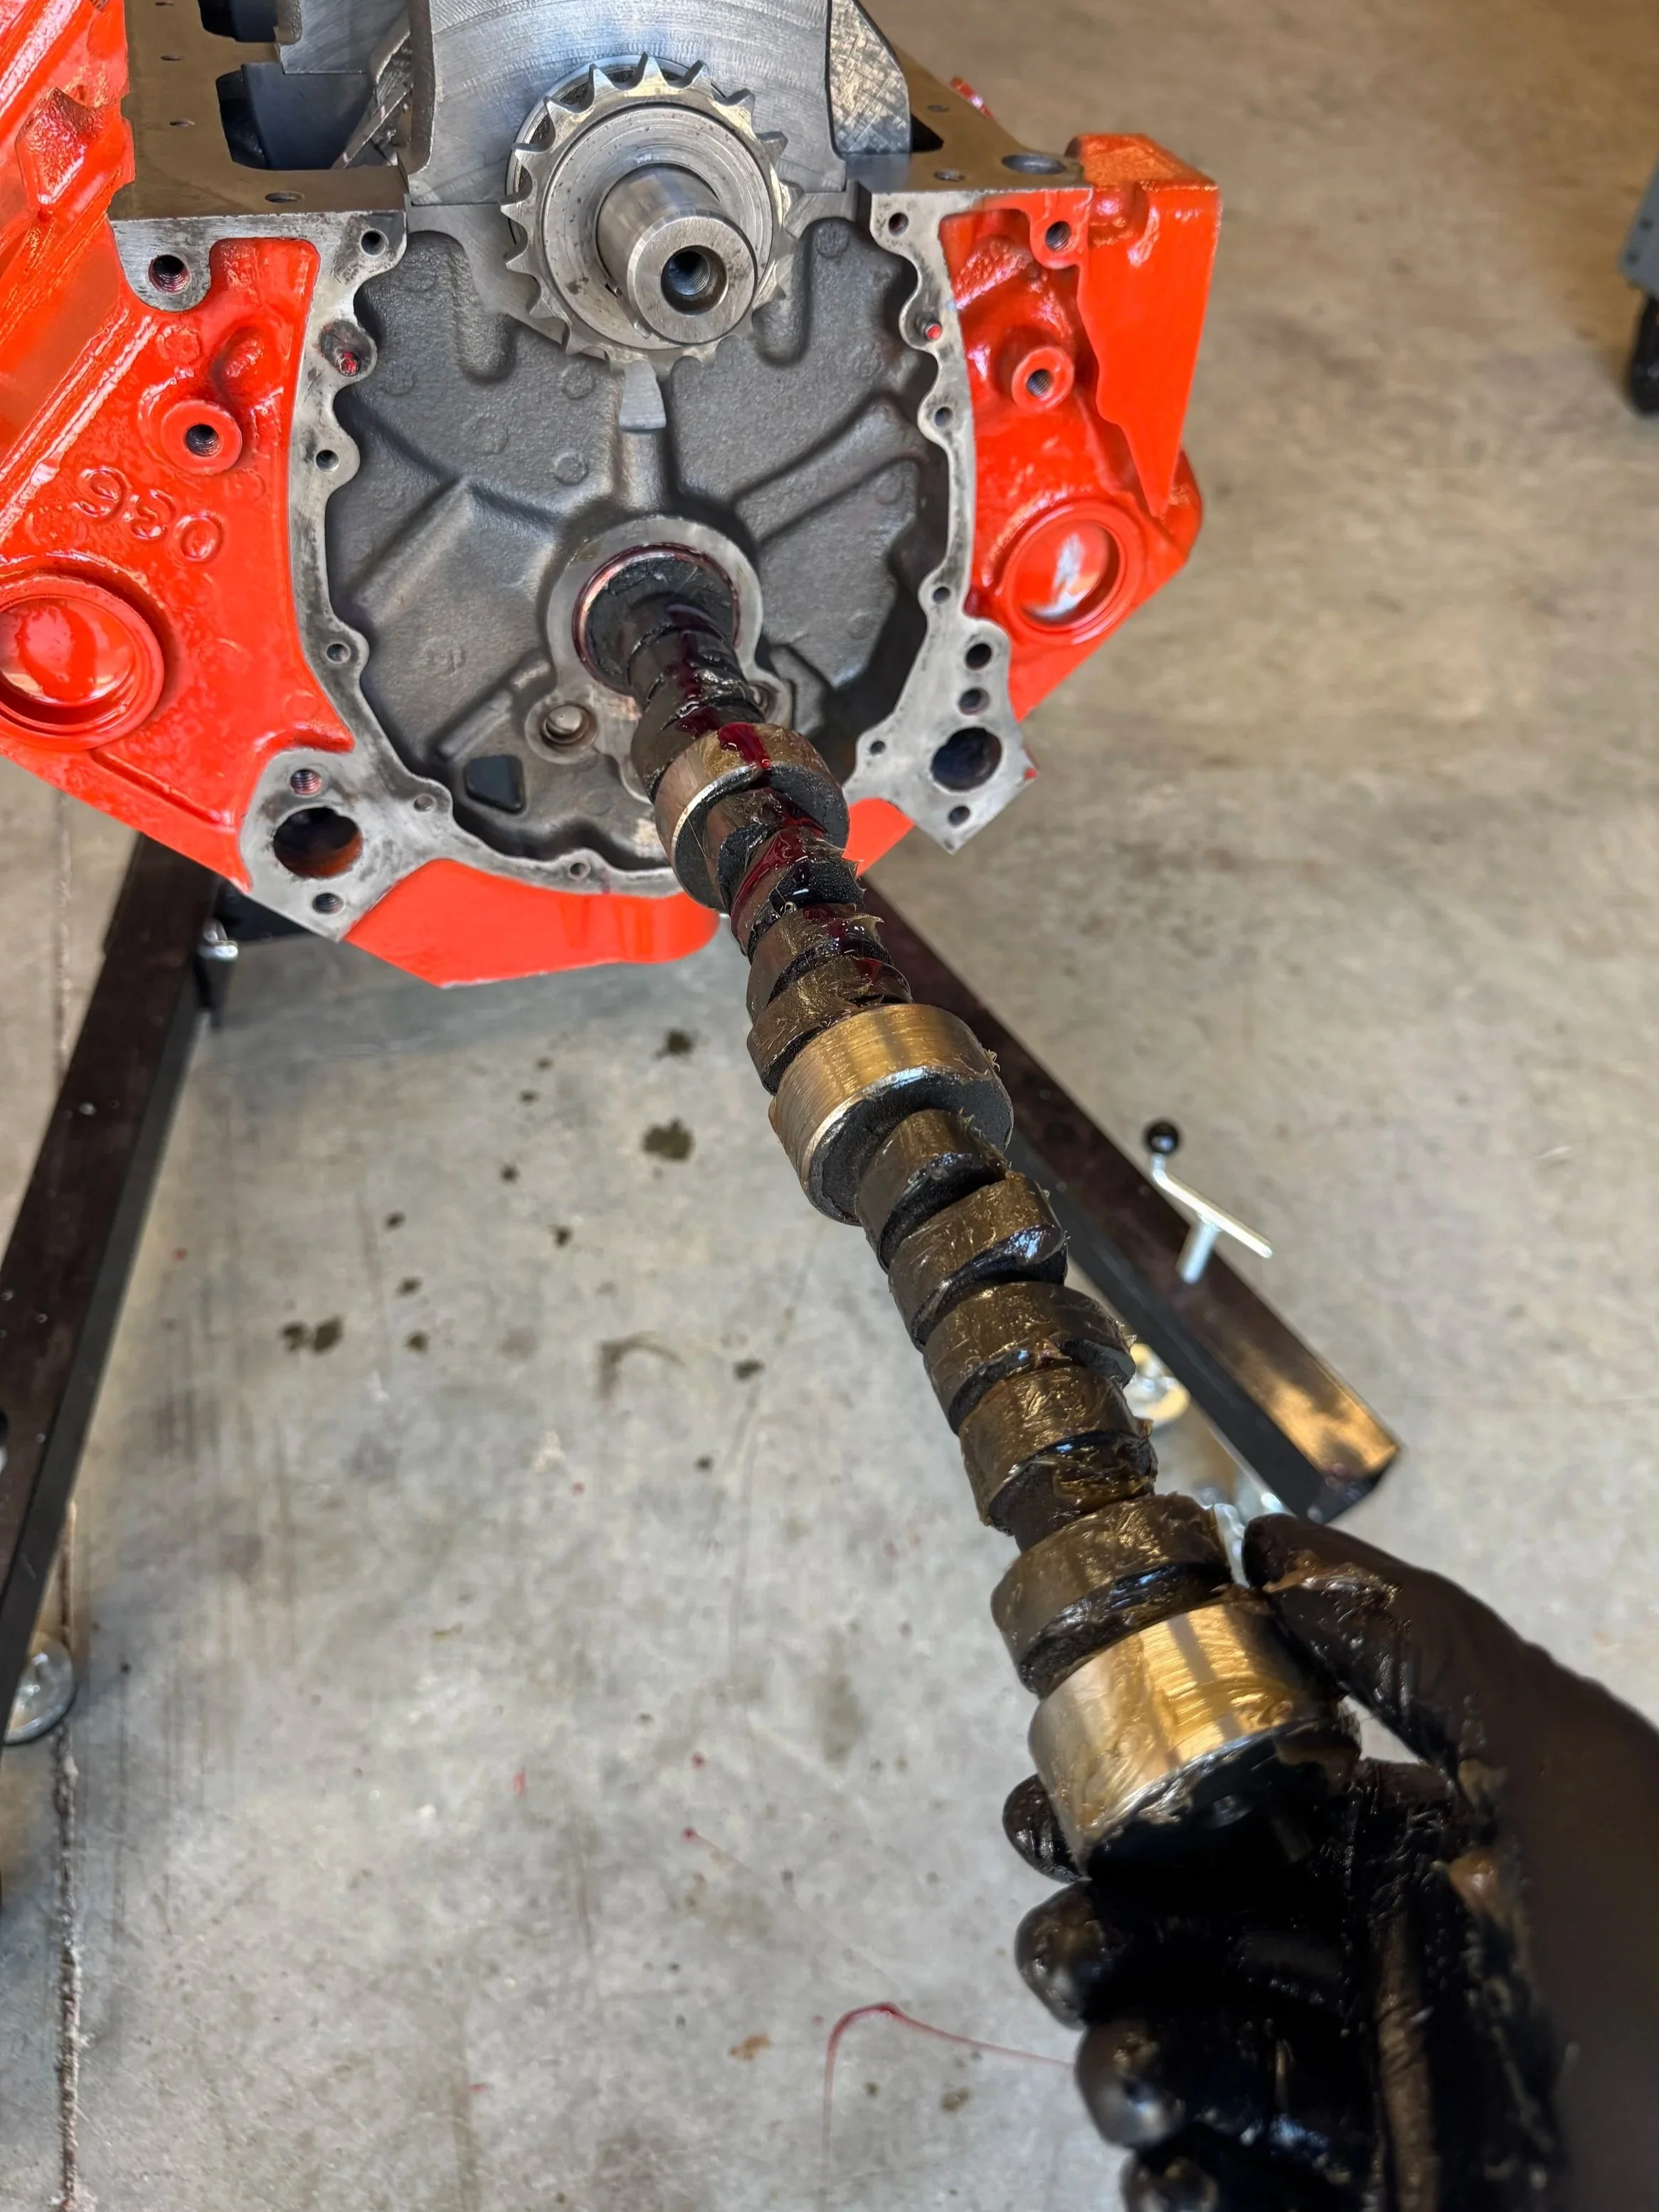
Howard’s Rattler Flat Tappet Camshaft
227 Intake/ 235 Exhaust
.480/.480 Lift @ .050 Duration
109 LSA
Edelbrock Dual Plane Performer Intake
Comp Cam DLC Hydraulic Lifters
Howard’s Performance Pushrods
Sealed Power High Pressure, Standard Volume Oil Pump (Performance pump but only around $50)
Summit Racing Bearings Throughout
Very inexpensive with high success rates
Can literally get all bearings for engine for around $75
Hastings Piston Rings
Could’ve went Sealed Power to save a few bucks, but I prefer the success I’ve had with Hastings.
Standard hardware except for a set of Engine Works High Tensile Head Bolts
Has 180,000 psi Tensile strength
Only $45 compared to ARP coming in at around $100
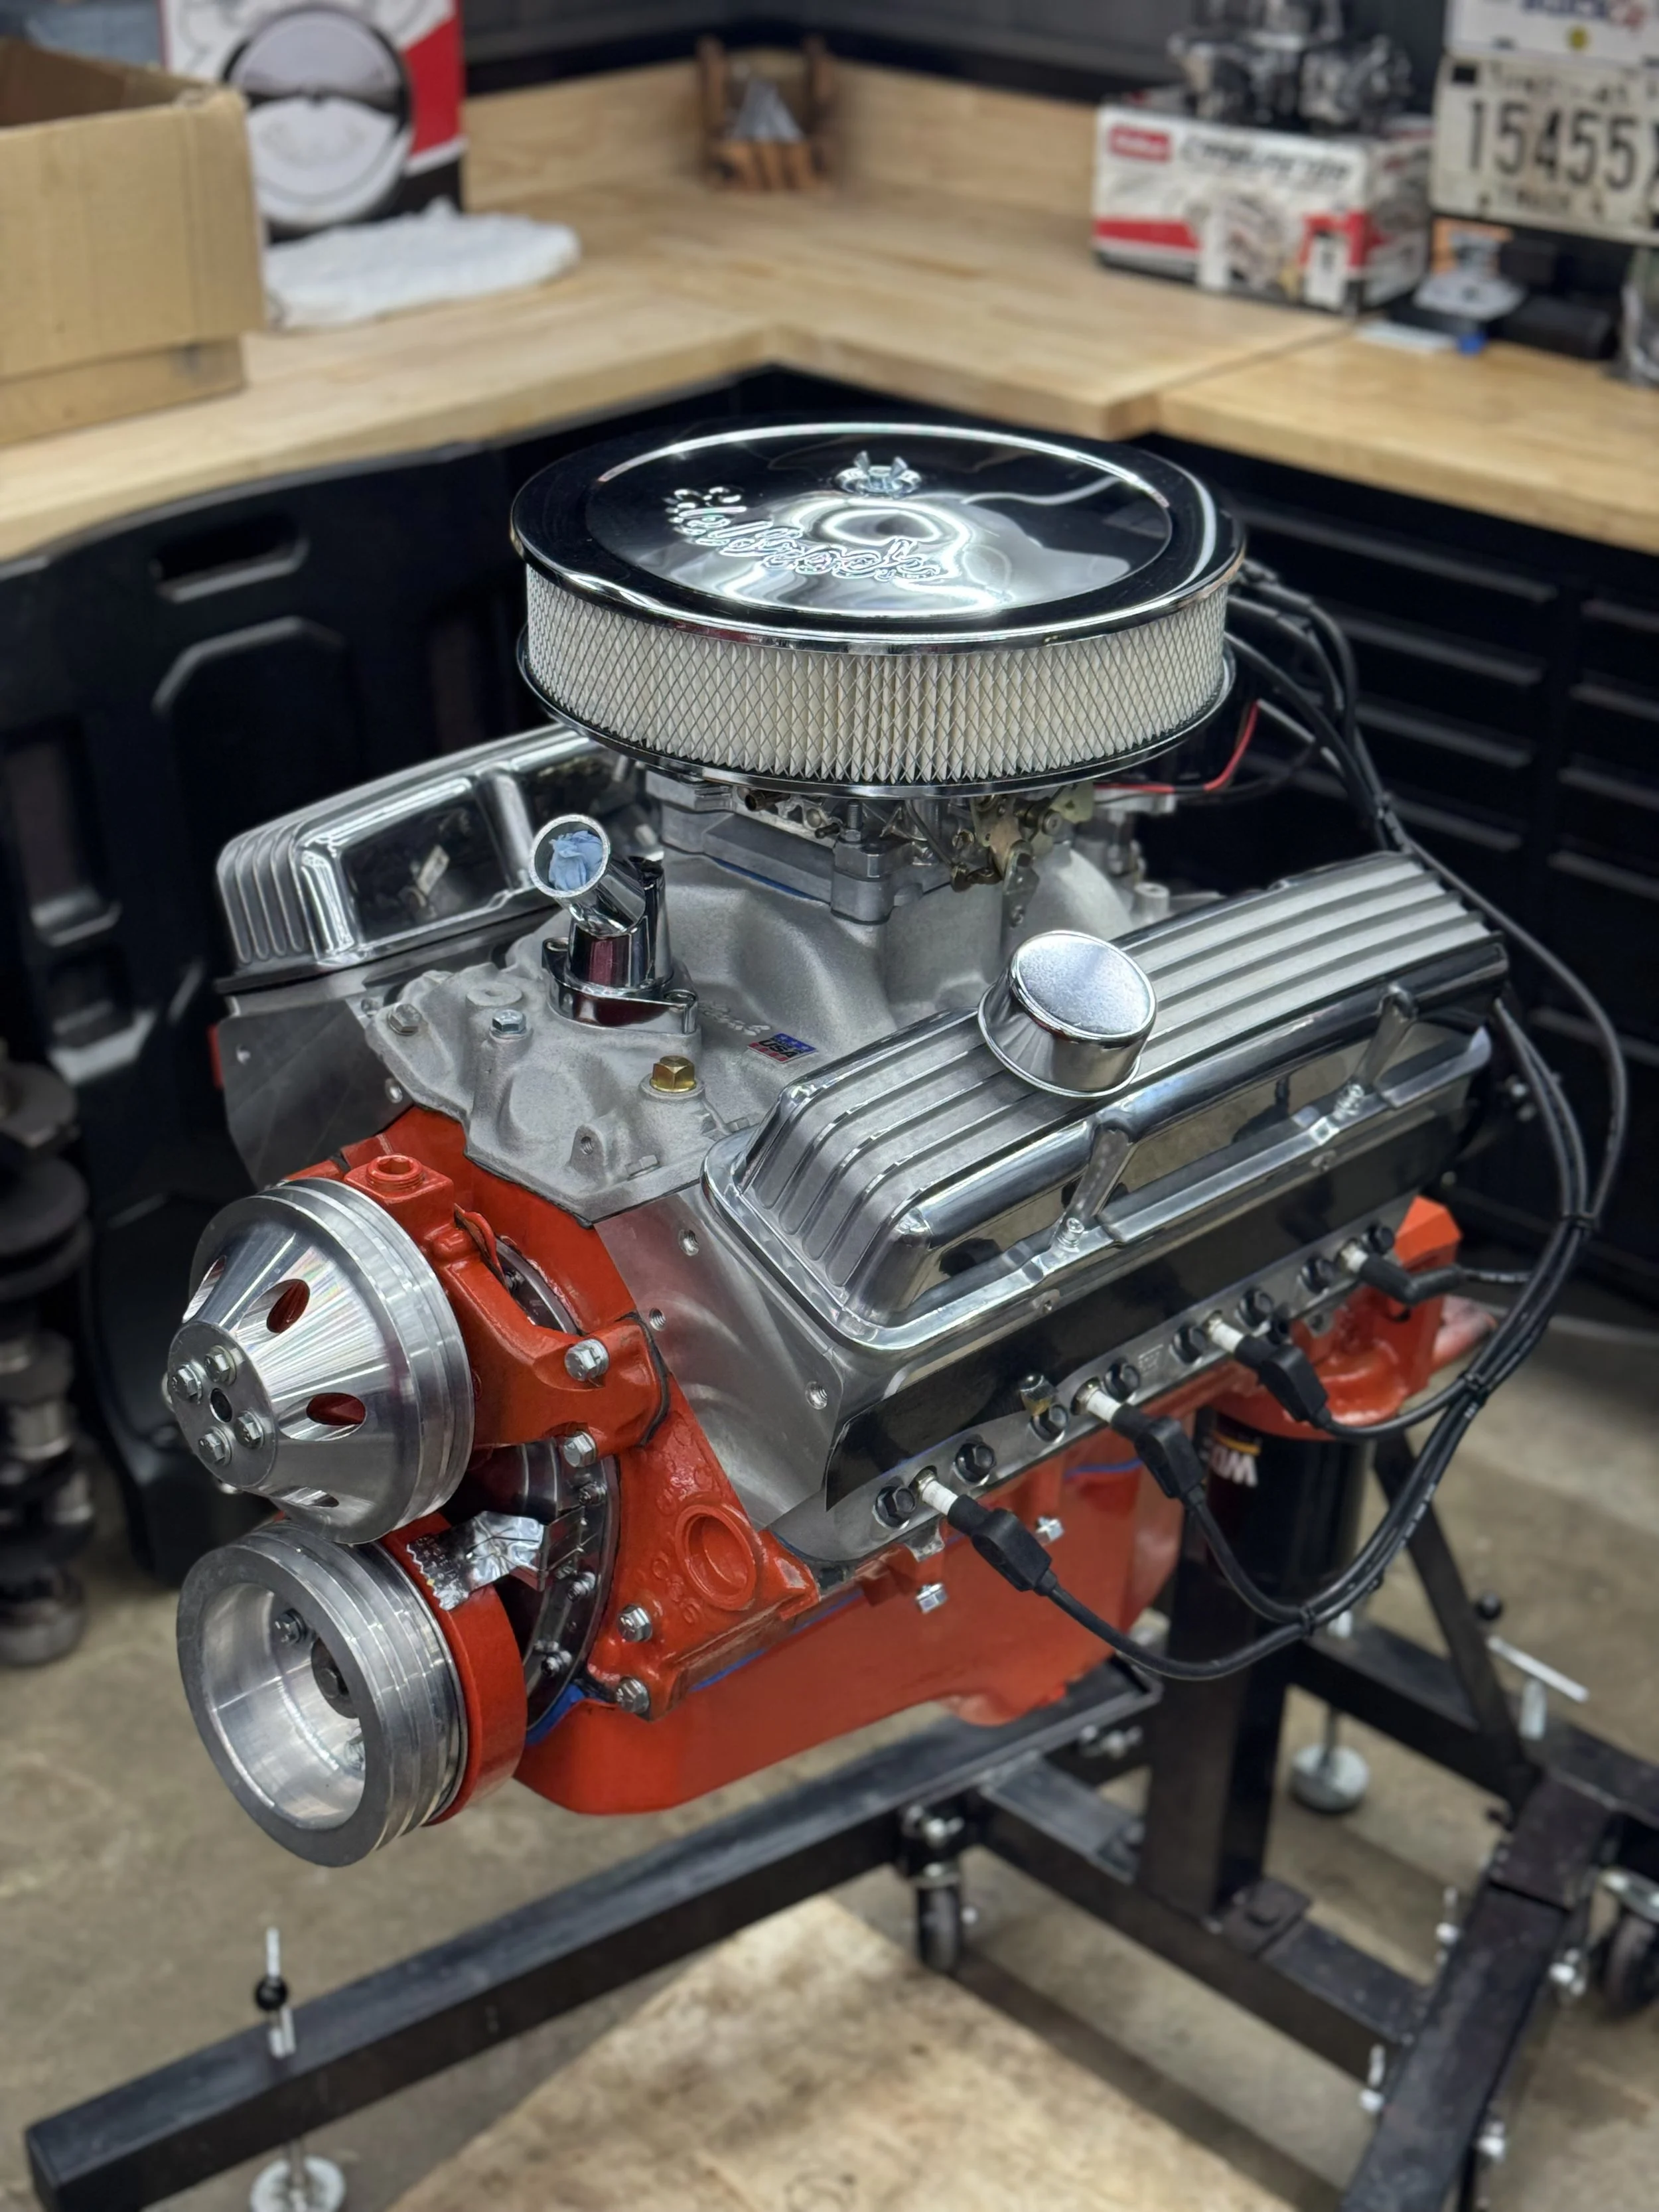
Cylinder Head Choice
One of the most important decisions you can make when it comes to any build, but in this case we’re looking at a budget build aka, one that doesn’t leave your wallet coughing out dust.
Aluminum heads is one of the absolute best upgrades you can make to achieve power
In this build in particular, we went with a set of Speedmaster 190cc heads
Extremely budget friendly aluminum head coming in at around $780 for the pair. Quality isn’t to the highest of standards, but it’s light on the wallet (due to quality management, I would not offer to build an engine with these heads for a customer).
Comparatively, the best bang for your buck would probably be AFR’s Enforcer series for an all around high quality low-buck cylinder head or ProMaxx’s Freedom or Maxx Series for higher flow rates but lower quality as far as hardware goes. AFR heads come factory with PAC springs and ARP screw in studs, but flow slightly less than ProMaxx and are a few hundred bucks more. For either set of heads you’re looking at around $1,100 for the ProMaxx setup and around $1,400 for the AFRs. But again, this is $400-600 more dollars than what I chose to spend on the Speedmaster set. Personally, if you’re all about pinching pennies which I totally get, Flotek offers decent performance (still miles over stock) for an extremely affordable price of around $950 for a pair of aluminum heads!
Regardless, nowadays even finding a set of nice CAST IRON heads say Vortec heads for example, people want almost $500 for a set on Marketplace and for a decent cam setup you’ll need to upgrade the valve springs and even most of the time if you want over .480” of lift @ .050, you have to machine the valve guides. By the time all that is said and done, you might as well have went with a decent set of affordable aluminum heads. At least that’s in MY OPINION, everyone can think how they like there’s no right or wrong answer!
Camshaft Choice
Here’s where people tend to either overdo it, or underdo it from my experience.
Right off the get-go, I’d like to say I’d recommend a hydraulic roller to absolutely anyone out there. Much safer, more stable, much better odds set against you.
Yes it is more expensive, BUT with the decrease in material quality nowadays, it’s kind of like a shot in the dark with what you’re gonna get. Might seems sort of hypocritical considering I used a flat tappet camshaft in this combo, but let me tell ya I went through and EXTENSIVE break in set up utilizing 1.3 roller rockers to decrease valve lift and stress on the valve train among a series of other caution oriented steps and I was still sweating the entire time.
I’m not certain, but it may even be a thing where the extra labor involved with a flat tappet installation / process, if a shop were to offer it, may add up close to where a roller cam may bring you. Haven’t quite mathed that out myself.
Now to get into why I chose this camshaft specifically, first of all budget was indeed in mind. Coming in around $200 this is a highly affordable option, but I knew going in the steps that I would need to take in order to prevent initial fire up failure.
Also with the budget friendly builder in mind, I took into consideration what they may be looking for.
My best bet would be that they’re in the market for something to get their project up and going and to put a smile on their face. They probably want it to look good, SOUND good, and turn a tire on occasion (some more than others). Now I know sound isn’t everything because that’s where a TON of people go wrong where they fly to the bottom of the catalog and choose the biggest cam available because they want that choppity-chop and I get that, which brings me to why I chose this cam. This cam definitely falls into the “mild” category. It’s no race cam, it’s not going to make huge top end power, what it’s going to do is provide a ton of mid-range torque (where you will actually get to use it when taking your project out for a spin), build cylinder pressure early which allows the engine to perform its strongest during street driving, and it sounds incredibly aggressive without actually having to be an aggressive camshaft. This cam sounds great, you can check it out here.
So as far as streetability goes, camshafts in this range are a good option and definitely beat most overcammed engines on the street today where the power band lies within a 3500-7000 rpm range because the last thing you want is to feel like it’s a job taking your project out for a spin when it’s meant to be enjoyable! And that’s something I definitely take into consideration when building my engines.
Also a trick to saving money while going roller for a camshaft!
GM came out with FACTORY roller engine blocks starting around 1987 and starting with an OEM roller block can sometimes save you money because the engine is already prepped for the roller cam. Unlike the blocks dating before 87’ where you’ll have to utilize something called a Retrofit roller cam that utilize link bar roller lifters and so on and so forth which can get pricey.
INtake
With this budget friendly, street driver SBC I knew my best choice would be a dual plane for this combo.
This allows more torque lower in the RPM band where you’ll get to experience it more often!
So whether you’re hitting the streets, rolling into it from part throttle, cruising around town at a steady RPM, passing someone on the highway, etc. You’ll mainly won’t be seeing over 5,000rpm except for on occasion so a dual plane made perfect sense here.
Also why I went with aluminum vs. cast iron
Since it’s a budget build, one may say cast iron is the way to go or to simply leave it stock. My main argument besides improved flow, throttle response, lightness is that these things are everywhere! I believe I picked this up for $80 off FB Marketplace in great shape! They’re so common now that if you absolutely don’t want to pay full market price and don’t mind cleaning up and prepping secondhand items, then you can which is a great way to save extra money on a budget build!
Overall Thoughts
I absolutely love this little combo!
Throttle response is on point
Doesn’t feel sluggish
Sounds radical even when it truly isn’t (maybe needs a 1800-2000 stall at best)
It’ll create good vacuum and not kill your brakes
It’ll allow your project car to be enjoyable on the streets!
Now this may not be the most optimal combo for you, it all depends on what you’re wanting! This is mainly a good idea towards the weekend warrior or those who plan to put more street miles on their vehicle than anything else. Still yet, I’m sure there’s plenty to improve upon when it comes to both performance and money savings! I’m still learning every single day so there is plenty out there for me to improve upon, but as far as an off the shelf budget build, I felt this was a great starting point for me!
Total invested w/ machine work not including my labor costs: Around $4500 and that’s carb to pan
Of course there are plenty ways to save extra money and steps people will skip, but in my opinion, $4500 for an engine like this is absolutely worth it!